Configuring M1 Extension
STEP 1: Connecting to Salesforce
In Magento, navigate to "Salesforce (tab) > Integration Setup > API Configuration (page)":
- Enter your API Username and API Password (your Username and Password for Salesforce account)
- Enter your Security Token (In some cases token is not required, please check with your Salesforce Administrator for more information)
- Enter the path to your WSDL file, but we are hoping you've already saved the file based on instructions from Magento 1: Installation page (see STEP 3)
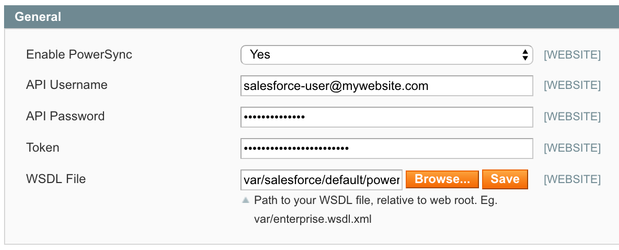
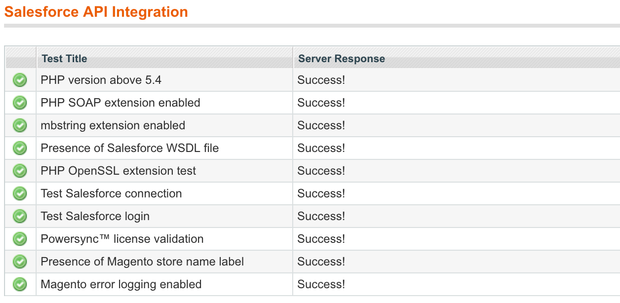
- Click "Save Config" button at the top right corner of the page
- If the information you've provided is correct, you will see green checkmarks
STEP 2: Synchronizing Magento Websites
It's IMPORTANT to complete this step first before you do anything else.
- Navigate to "System > Manage Stores (page)"
- Click on "Synchronize w/ Salesforce" button at the top of the page

STEP 3: Configuring the Type of Synchronization
In Magento, navigate to "Salesforce (tab) > Integration Setup > API Configuration (page)". Open "Synchronization (section)".
There are only two options for you to pick from:
- Realtime
- Scheduled
IMPORTANT
Realtime is NOT recommended for the Production environment due to potential network and server performance impact. This setting is primarily available to be used for lower level environments for testing and when you need the data in Salesforce to be available right away.
The scheduled option is the most common and highly recommended for your Production website.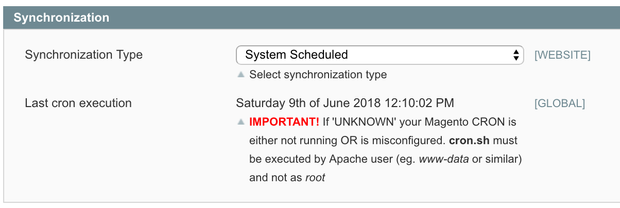
STEP 4: License (deprecated)
Leave this section blank. This feature is deprecated starting with the connection version 01.59 and higher.

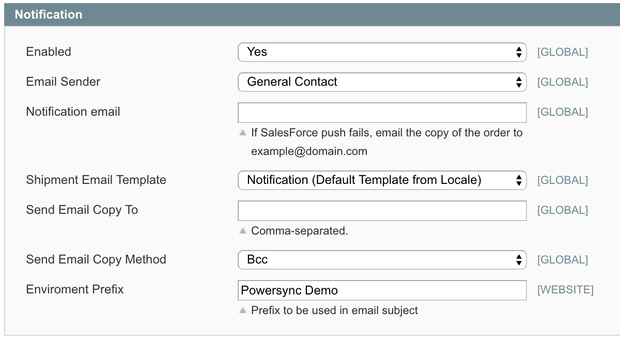
STEP 5: Notifications
You can use our built-in capability which will send you automated emails if and when there is a problem synchronizing a record with Salesforce.
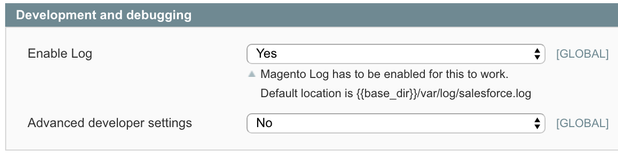
STEP 6: Advanced Settings
We do NOT recommend messing with any settings under the Advanced Develop Settings section. Those are used to high-tune your environment based on your setup and server specs.
STEP 7: Customers Configuration
See Magento 1 Customer Configuration for instructions.
STEP 8: Products Configuration
See Magento 1 Product Configuration for instructions.
STEP 9: Sales Configuration
See Magento 1 Sales Configuration for instructions.
STEP 10: Contact Us Form Integration Setup
See Magento 1 Contact Us Form Integration for instructions.
STEP 11: Promotions Integration Setup
See Magento 1 Promotions Integration for instructions.
STEP 12: Shipments Integration Setup
See Magento 1 Shipment Integration for instructions.
STEP 13: Invoices Integration Setup
See Magento 1 Invoice Integration for instructions.
STEP 14: Credit Memo Integration Setup
See Magento 1 Credit Memo Integration for instructions.
STEP 15: Account Matching Rules (optional)
See Magento 1 Account Matching Rules for instructions.
STEP 16: Mapping Order Statuses
See Magento 1 Order Statuses for instructions.