Salesforce To Magento Integration Setup
Introduction:
What is OAuth?
OAuth is an open standard for access delegation, commonly used as a way for Internet users to grant websites or applications access to their information on other websites but without giving them the passwords. This mechanism is used by companies such as Amazon[2], Google, Facebook, Microsoft and Twitter to permit the users to share information about their accounts with third-party applications or websites.
If you want to connect your Salesforce and Magento, you must configure the solution to leverage Magento OAuth capabilities.
Configuring Magento:
STEP 1: Creating oAuth Consumer
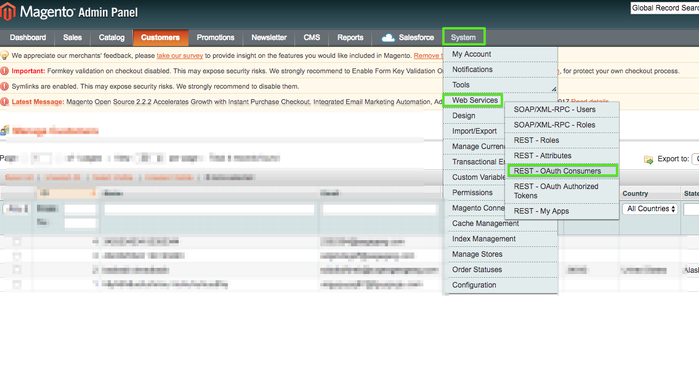
Navigate to "System->Web Services ->REST oAuth Consumers" page
- Click on “Add New” button to add new Consumer Application
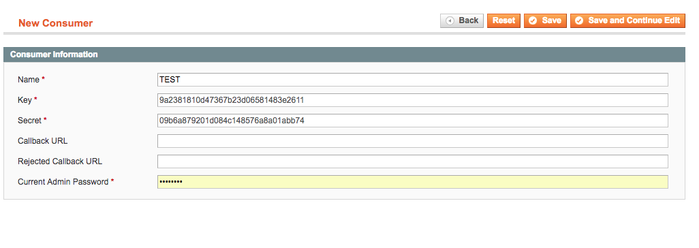
- On “New Consumer” screen define some name.
- The "Key" and "Secret" fields value will be predefined automatically by Magento. NOTE: You'll need these values later in Salesforce.
- Click the "Save" button
STEP 2: Create and configuring Rest role
- Navigate to the "System -> Web Services -> REST Roles" page
- Click the “Add admin Role” button
- In the field “Role name” enter for example “REST Role”
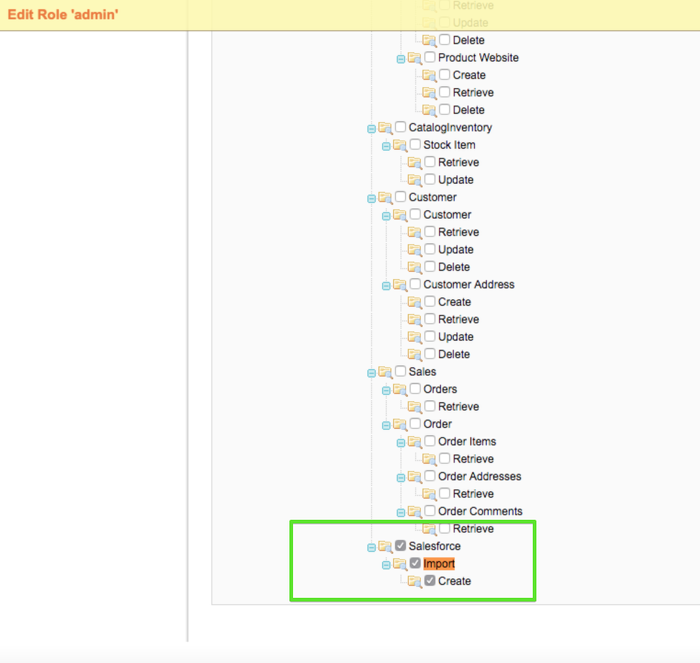
- Click on “Role API resources” tab on the left and tick the Salesforce / Import / Create checkboxes, It'll allow this Role access to our module API methods
- Or you can allow access to the all resources here
- Save this role
STEP 3: Assigning configured REST Role to the admin user
- Open the following page: "System->Permissions->Users"
- Find a user you plan to use for the sync process (or create a new one)
- The "Edit user" page will be shown
- Click the "REST role" tab here
- Click on “Assigned” radio box near that role name you created in our previous step
- Save changes
Configuring Salesforce:
Note
You will require our latest SalesForce managed packages installed before starting.
See Installing & Upgrading Salesforce Managed Packages for the latest versions of our Managed packages
STEP 1: Allowing the Connection
During installation, of our Managed Packages you will be prompted to allow Salesforce to call "http://license.powersync.biz", which you accepted.
- Navigate to "Setup" > "Administration Setup" > "Security Controls" > "Remote Site Settings"
- You should see "MagentoURL" setting
- Click: "Edit"
- Update Remote Site URL to point to your website: eg. https://my.website.com
- IMPORTANT: URL has to be HTTPS, the connection will not work with regular HTTP connection.
- Click "Save"
STEP 2: Configuration
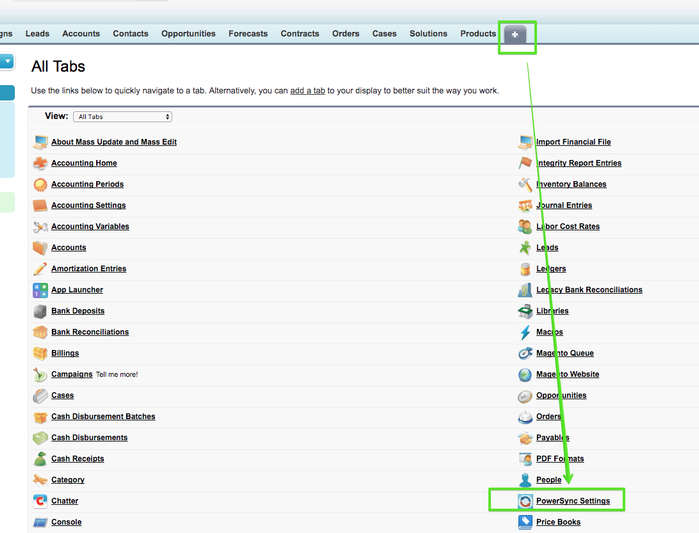
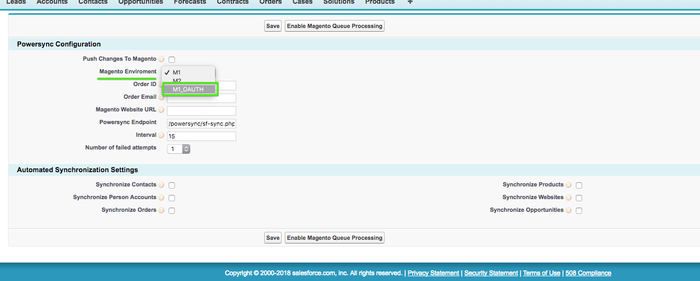
- Navigate to the PowerSync settings page:
- Choose the "M1_OAUTH" option under the "Magento Enviroment" dropdown:
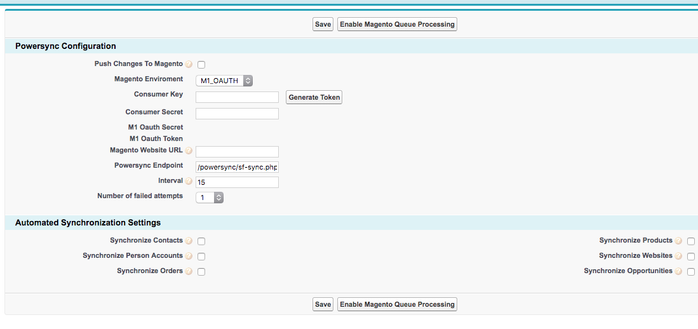
- Page will be reloaded and new fields will be shown:
- Fill the "Consumer Key" and "Consumer Secret" fields by the values from your Magento (see STEP 1 from "Magento Configuration" section above)
- Fill the "Magento Website URL"
- Add "/api/rest/tnw_import" to "Powersync Endpoint" field
- Check the "Push Changes To Magento" checkbox
- Save it
- Click the "Generate Token" button
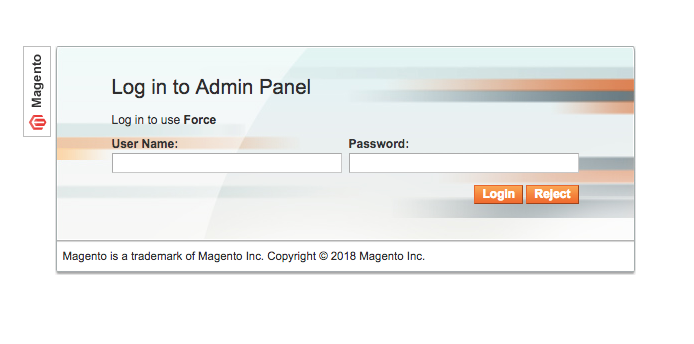
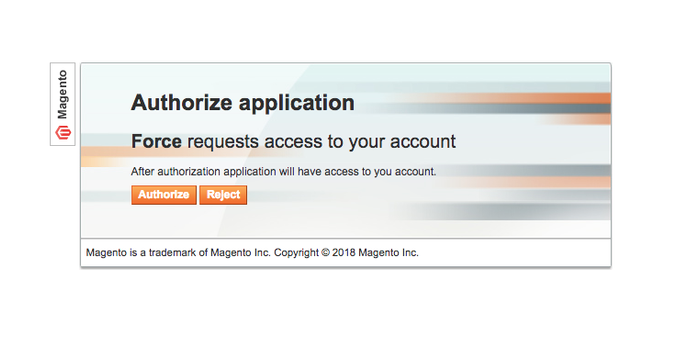
- You'll be redirected to the authorization page of your store admin area.
- NOTE: This step will be skipped if you logged in your Magento Admin area.
- Login into Magento using an account assigned to "REST Role" (from STEP 2 under Magento Configuration section above)
- If you logged in alread the authorization request will be shown, you should click the "Authorize" button
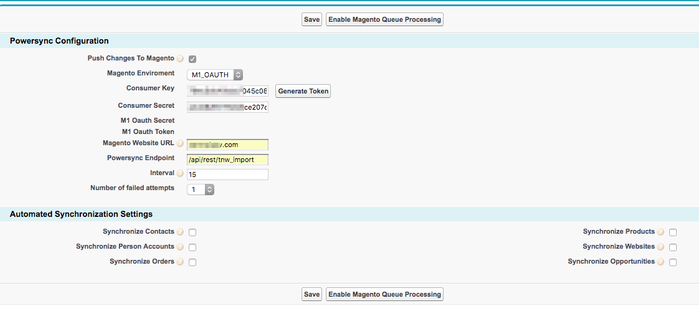
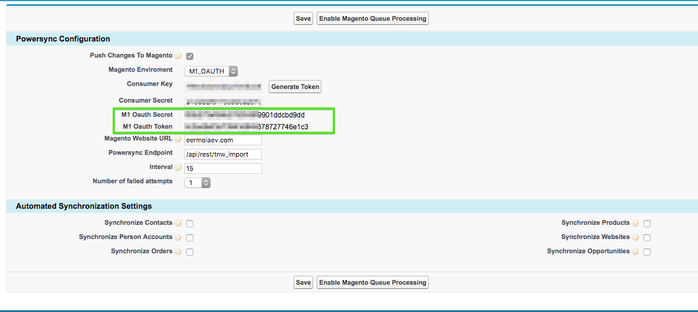
- You'll be redirected back to the Salesforce package settings:
- If connection was esablished successfully, you will see the "M1 Oauth Secret" and "M1 Oauth Token" fields populated'
- Check the entities you plan sync from Salesforce to Magento under the "Automated Synchronization Settings"
- Save the configuration again
- Finally, click the "Enable Magento Queue Processing" button to enable the scheduled queue processing
Helpful links:
http://devdocs.magento.com/guides/m1x/api/rest/introduction.html#RESTAPIIntroduction-Authentication
http://inchoo.net/magento/configure-magento-rest-and-oauth-settings/
