Configuration: Discounts
There are two ways you can set up discounts with the Quickbooks Online integration from PowerSync:
- You can use a single Discount Account, which is configured at the global level.
- You can configure the discounts to be synchronized into multiple Discount Products, which are controlled on a “per product” basis in your Magento catalog.
Below is the step-by-step guide which will walk you through the configuration on both of these use cases.
Single Account
- From Magento admin, navigate to Stores > Configuration > TNW Quickbooks > Orders.
- Scroll down to the “Accounts” section and under “Discount Configuration” select “Use a single Account”. Then select the appropriate Quickbooks Discount Account from the next dropdown.
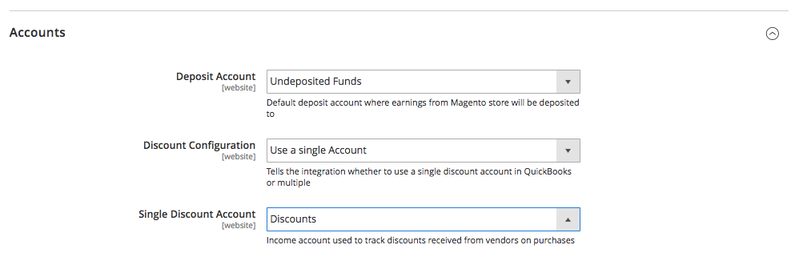
NOTE: these settings are the default settings Magento will use if no other rules are applied. Think of this is a catch-all rule for all discounts coming from Magento.
Per Product
The “Per Product” configuration tracks discounts using Discount Products in Quickbooks.
NOTE: To do this you will want to set up a non-inventory product and it MUST HAVE the word “discount” in the name.
STEP 1
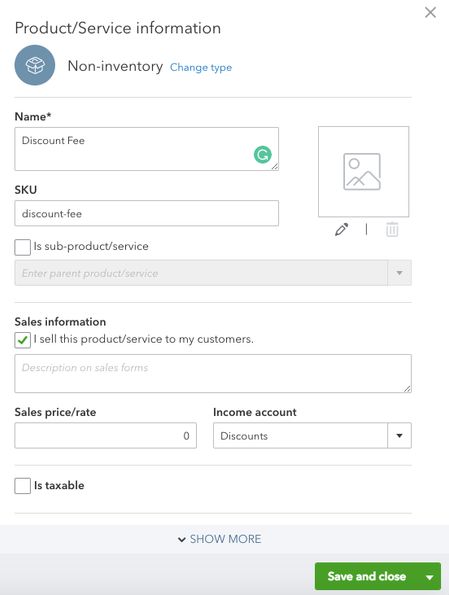
- In Quickbooks Online, navigate to Gear Icon > Products and Services.
- Click on New > Non-inventory. For our example we are going to create a product called “Discount Fee”.
- Create additional sub-products underneath it for more advanced tracking.
STEP 2
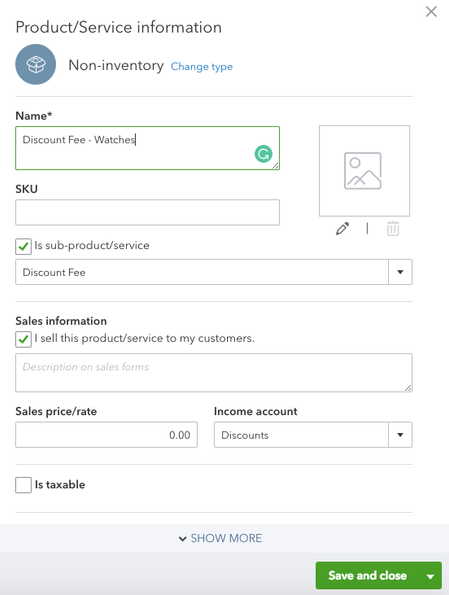
Let’s assume we want to track discounts based on product type (in our case this will be watches).
- Under the “Discount Fee” product we will create a sub-product called “Discount Fee – Watches”.
- We’ll check the “Sub-product/service box” and select the appropriate parent product.
STEP 3
- From Magento admin, navigate to Stores > Configuration > TNW Quickbooks > Orders.
- Scroll down to the “Accounts” section and under “Discount Configuration” select “Per Product”. A list of your Discount products will be available to select from in the Discount Account dropdown.
- Select “Discount Fee” or whatever you named your parent product here.
NOTE: this setting is the default setting Magento will use if no other rules are applied. This means that if the discount account is NOT defined at the product level, the discount will be captured in this category.
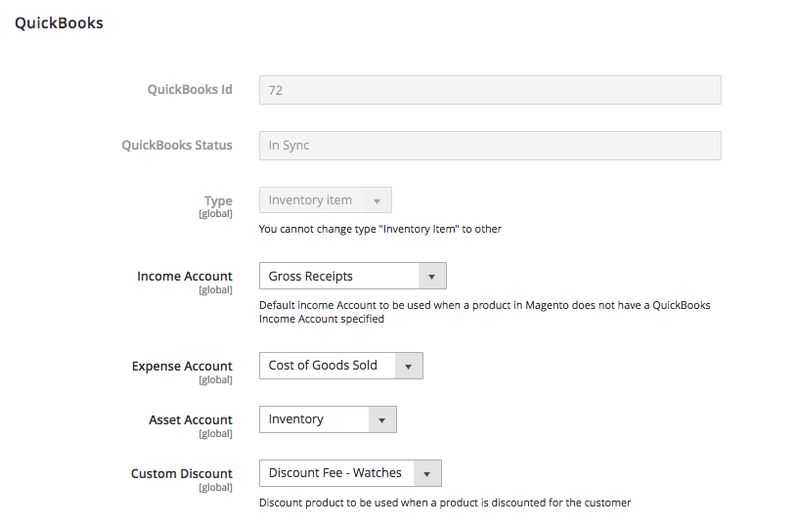
- Next, navigate to Catalog > Products and edit the product you want to update. Scroll down to the section called QuickBooks and under Custom Discount select the appropriate account. In our case this is “Discount Fee – Watches”.
- Repeat these steps for each product/category you want to be able to track separately.
Related articles