Paid Package
Thank you for choosing PowerSync! This guide will walk you through and help you install our connector in your environment so you can start synchronizing Magento data with Salesforce today!
STEP 1: Installing Salesforce Managed Package
See Installing & Upgrading Salesforce Managed Packages for instructions.
STEP 2: Creating Price Book(s) and configure Salesforce fields
Our connector requires a custom PriceBook to be used for each Magento Website you have.
In main navigation
- click on "+" (tab)
- click on "Price Books"
- This page will list all PriceBooks you have in your Salesforce Org. Click "New" button.
- Fill our the Price Book Name field (we recommend this name to match your Magento Website Name)
Example: shop.mydomain.com - Check the "Active" checkbox.
- Skip everything else and click "Save".
- NOTE: if you are creating multiple Price Books for multiple Magento Websites, repeat steps 3 through 6 in this list
When you need to configure fields access level on the Salesforce side, see Salesforce field access changes
STEP 3: Generating Enterprise WSDL File
See Generating the WSDL file for details. After you downloaded the file onto your computer, save it and we will need this file later.
We recommend using a naming convention for your WSDL files to match your environments. Each separate Magento installation will require its own WSDL file and must be connected to a separate Salesforce Org.
File Name Examples:
- mywebsite.com.wsdl.xml
- qa.mywebsite.com.wsdl.xml
- test.mywebsite.com.wsdl.xml
- dev.mywebsite.com.wsdl.xml
STEP 4: Installing Magento Extension
See Magento 2: Magento Extension for instructions.
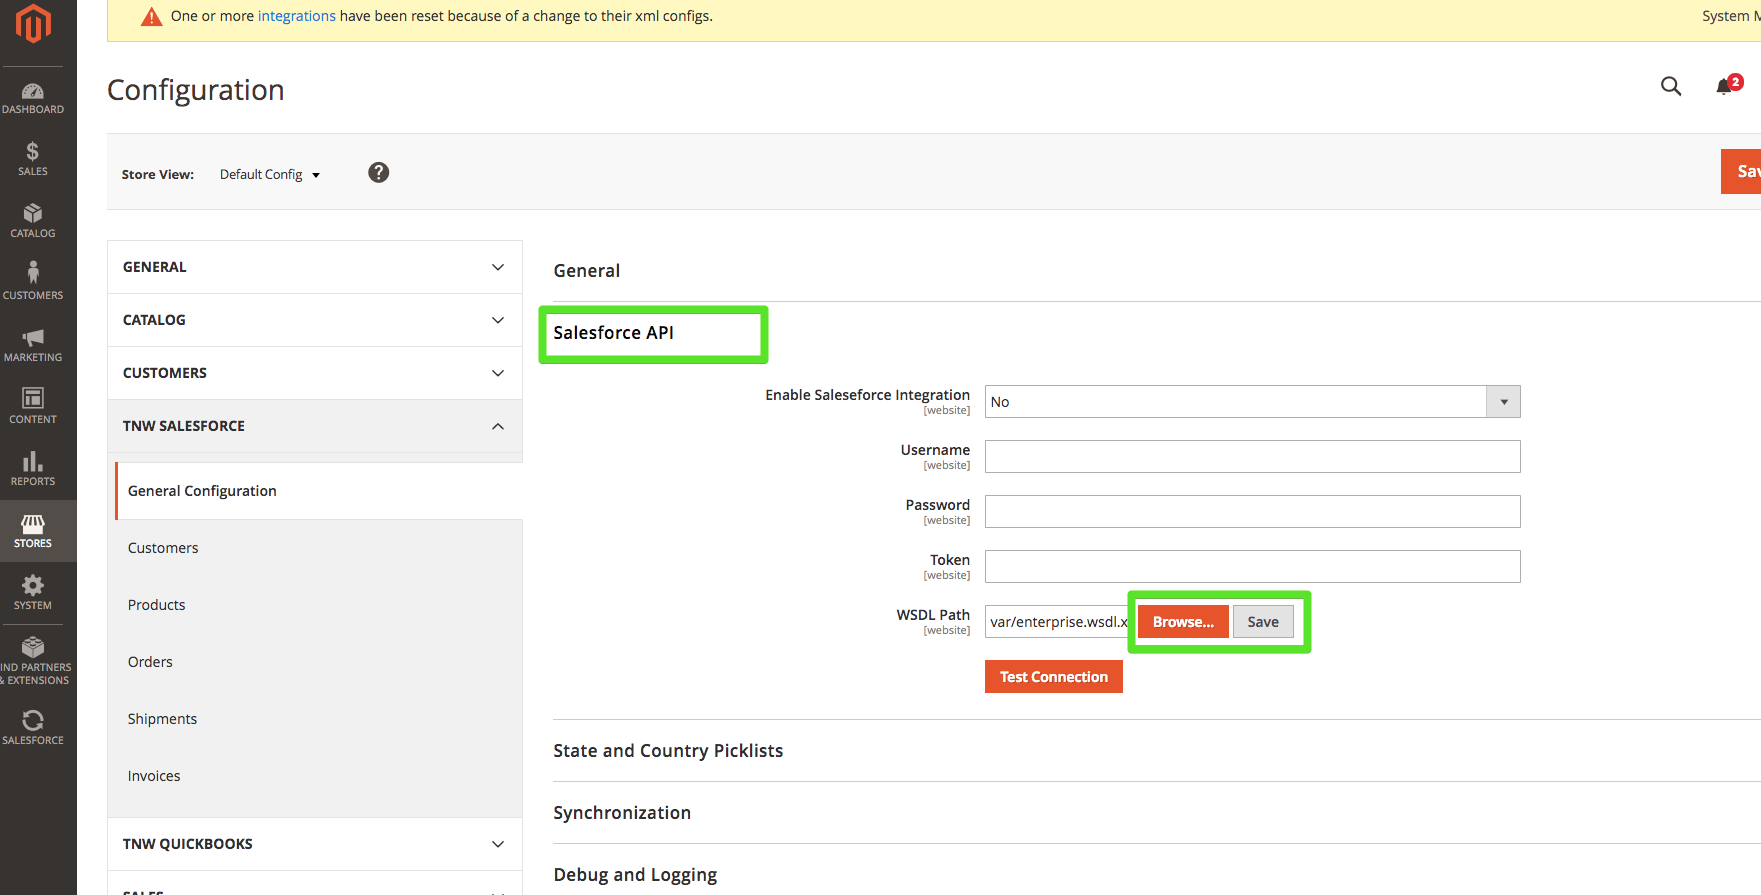
STEP 5: Upload the WSDL File
Go to the module General configuration page

Use the "Browse" and "Save" buttons under the "Salesforce API" section:
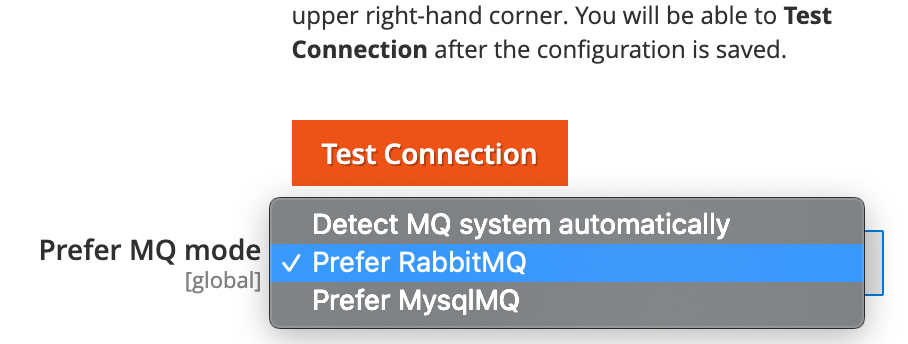
STEP 6: Configure CRON Jobs or RabbitMQ
See Magento 2 CRON & MQ Setup for instructions first.
Our consumers list:
tnwSalesforceSyncRealtimeAmqp
tnwSalesforceSyncRealtimeDb
tnwSalesforcePrequeueProcessDb
tnwSalesforceQueueProcessBackgroundDb
tnwSalesforceQueueProcessNormalDb
tnwSalesforcePrequeueProcessAmqp
tnwSalesforceQueueProcessBackgroundAmqp
tnwSalesforceQueueProcessNormalAmqp
tnwSalesforceQueueProcessCheckNormalDb
tnwSalesforceQueueProcessCheckNormalAmqp
tnwSalesforceQueueProcessCheckBackgroundDb
tnwSalesforceQueueProcessCheckBackgroundAmqp
tnwSalesforceSyncQuoteDb
tnwSalesforceSyncQuoteAmqp
tnwCountryStateUpdateConsumerDb
tnwCountryStateUpdateConsumerAmqp
Magento Commerce Cloud offers RabbitMQ out of the box with all new Magento implementations. If your infrastructure was set up in 2020 or earlier, you may need to enable RabbitMQ manually.
When RabbitMQ is enabled, you simply choose it in the configuration of our solution
STEP 7: Configure Magento to Push Data to Salesforce
See Configuring the Magento 2 extension for instructions.
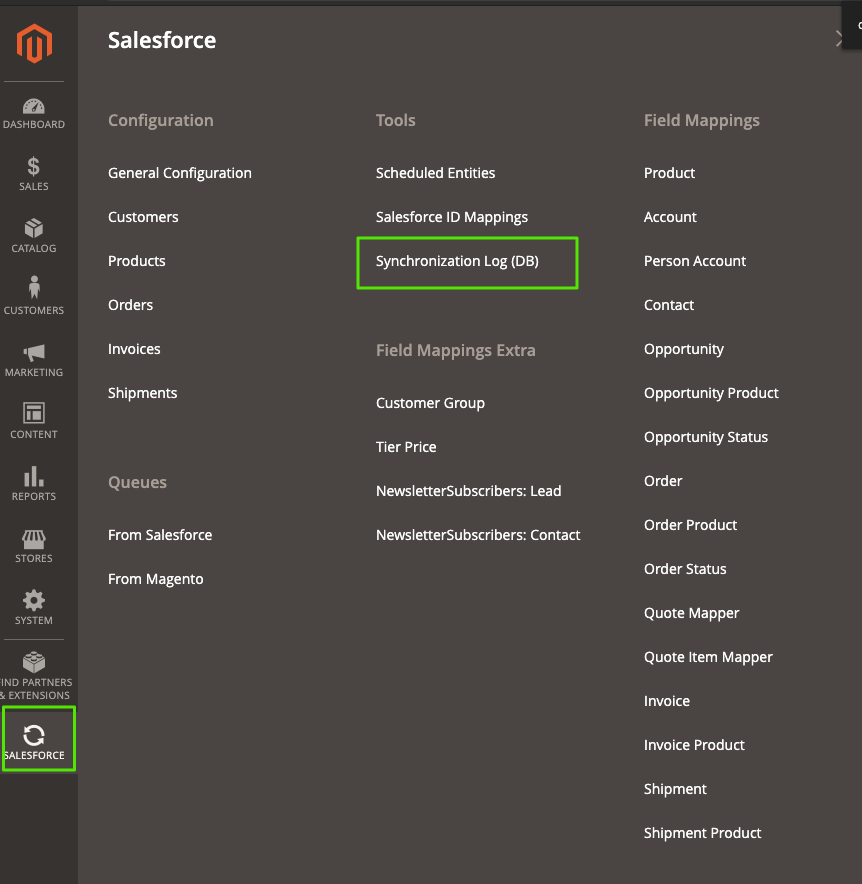
STEP 8: Schedule order grid refresh action:
You need to pass this step if you already had module tnw/sforceenterprise v.2.6.33 or older. This step will update order grid page and provide you with the ability filter/sort records by the Salesforce Sync Status column.
- Open the "Synchronization log" page in your Magento Admin area:
- Click the "Refresh Order Grid" button
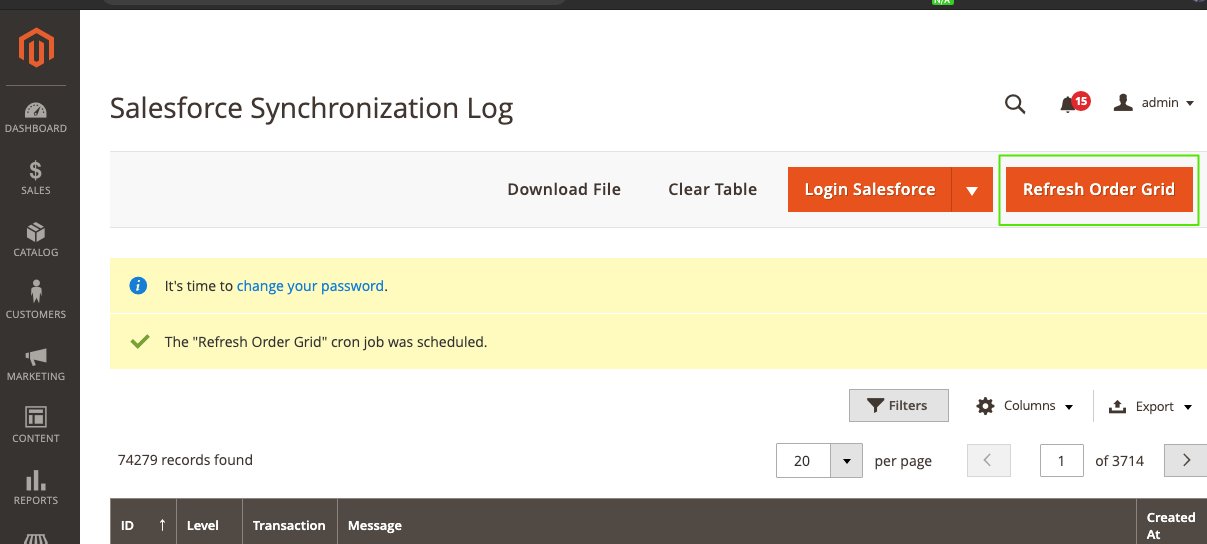
- You'll see the The "Refresh Order Grid" cron job was scheduled message and your Order Grid page will looks like here:
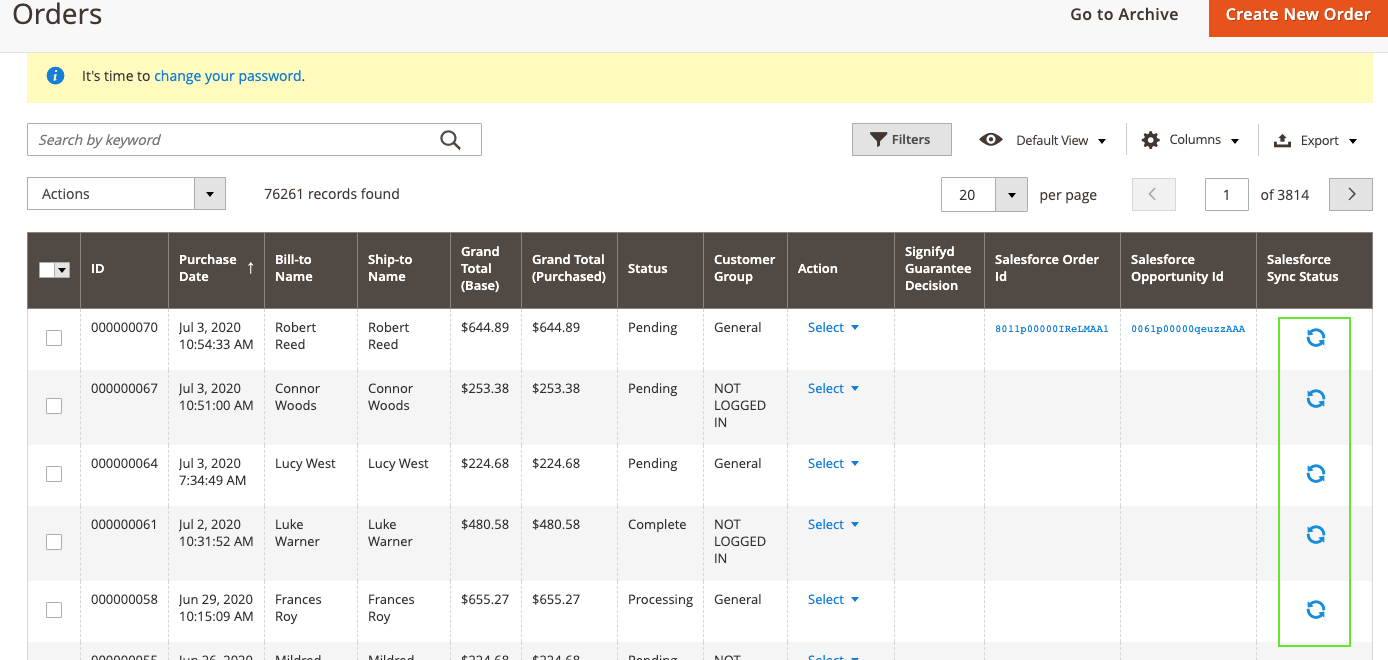
- About 5-15 minutes later the Order Grid table will be refreshed and you'll see an actual sync statuses.
STEP 9: Configure Salesforce to Push Data to Magento (optional)
See Salesforce To Magento Integration Setup for instructions.