Configuration
STEP 1: Get Your Authorize.net Credentials (New Merchant)
- Visit Authorize.net Payments and sign up for an account.
STEP 2: Complete the Basic Setup
- In Magento Admin, click on Stores. Then under Settings, choose Configuration.
- In the side menu under Sales, choose Payment Methods.
- IMPORTANT: If your Magento installation has multiple websites, stores or views, make sure to select the proper scope in the drop-down at the top left-hand corner of the side navigation.
- In the Merchant Location section, verify that Merchant Country is set to the location of your business.
- Under Other Payment Methods, in the Authorize.net CIM section, click on the arrow to expand the section.
- Expand "Basic Settings" tab
- Enter a Title to identify Authorize.net as a payment option during checkout.
- Set the current operating Environment for Authorize.net transactions to one of the following:
- Sandbox
Live
When testing the configuration in a sandbox, use only credit card numbers that are recommended by Authorize.net. When you are ready to go live with Authorize.net, set Environment to Live.
- Set Payment Action to one of the following:
- Authorize Only - Approves the purchase and puts a hold on the funds. The amount is not withdrawn from the customer’s bank account until the sale is “captured” by the merchant.
- Authorize and Capture - The amount of the purchase is authorized and immediately withdrawn from the customer’s account.
- Enter the following credentials from your Authorize.net account:
- API Login ID
- Transaction Key
- Client Key
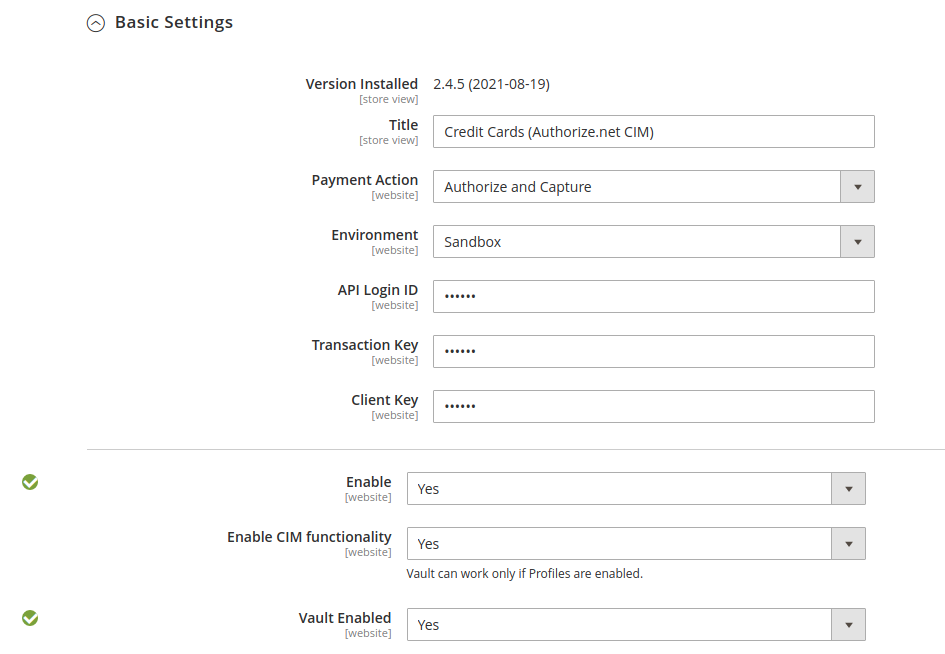
- Set Enabled to Yes.
- If you want the ability to store customer information securely, set Vault Enabled to Yes. This feature will allow your customers to place subsequent orders quickly without having to re-enter their information again.
- Enable CIM functionality option if needed. The Authorize.Net Customer Information Manager (CIM) allows you to store customers' sensitive payment information on secure servers, simplifying your compliance with the Payment Card Industry Data Security Standard (PCI DSS) as well as the payments process for returning customers and recurring transactions
STEP 3: Complete the Advanced Settings (optional)
Expand the Advanced Settings section.
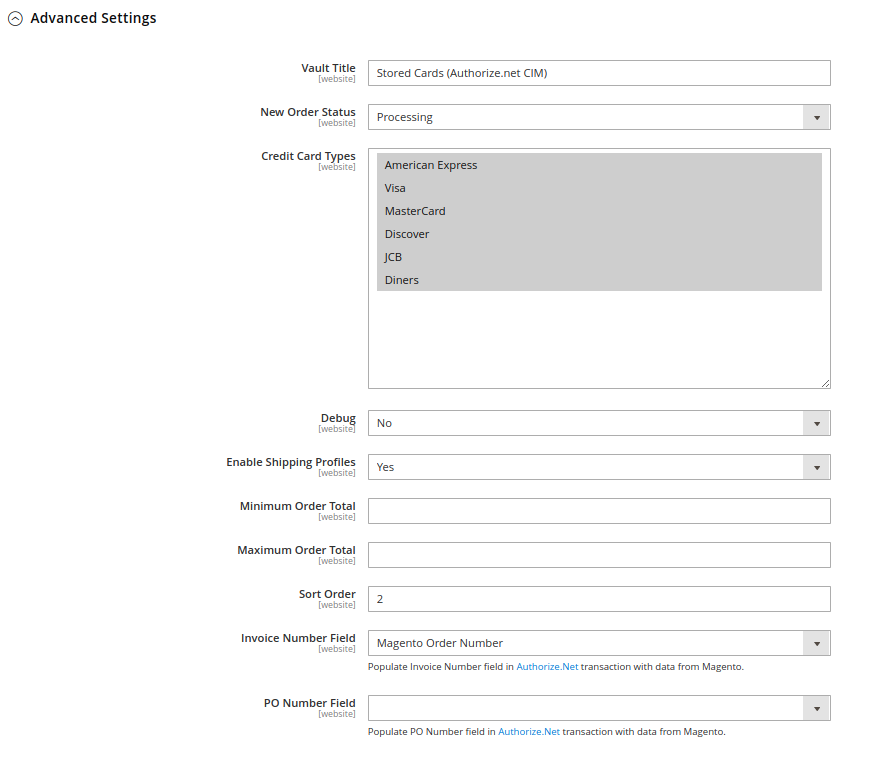
- In the Vault Title field, enter a descriptive title for your reference that identifies the vault where your customer card information is stored.
- Select New order status for orders placed with Authorize.net CIM payment method
- In the Credit Card Types box, hold down the Ctrl key, and select each credit card that is accepted by your store as payment through Authorize.net.
- If you want the system to save a log file of interactions between your store and Authorize.net, set Debug to Yes.
- Enable Shipping Profiles option if needed
- Enter the Minimum Order Total and Maximum Order Total for Direct Post transactions. To qualify, the order total must exactly match the minimum or maximum threshold, or fall somewhere in between.
- In the Sort Order field, enter a number to determine the sequence in which Authorize.net appears when listed with other payment methods during checkout.
- Define Invoice Number Field and PO Number Field
STEP 4: Country Specific Settings (optional)
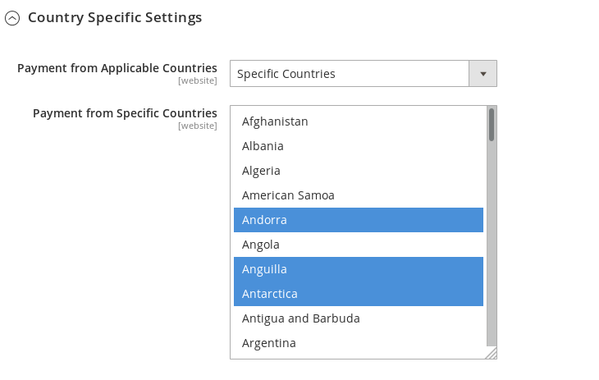
- Set Payment from Applicable Countries to one of the following:
- All Allowed Countries
Specific Countries
For Payment from Specific Countries, hold down the Ctrl key and select each country from which you accept payment.
STEP 4: 3D Secure Verification Settings (optional)

- Set Enable 3D Secure Verification to Yes. This option turns On/Off 3D Secure Verification functionality. For extra fraud protection, 3D Secure requires customers to complete an additional verification step with the card issuer when paying
- Provide Threshold Amount. 3D Secure Verification will be applied when the payment amount exceeds this value
- Enter the following credentials:
- API Identifier
- Org Unit ID
- API Key
- Script URL
- Set Verify for Applicable Countries to one of the following:
- All Allowed Countries
Specific Countries
For Verify for Specific Countries, hold down the Ctrl key and select each country from which you accept payment.
, multiple selections available,