| Table of Contents | ||
|---|---|---|
|
...
STEP 1: Creating oAuth Consumer
Navigate to "System->Web Services ->REST oAuth Consumers" page
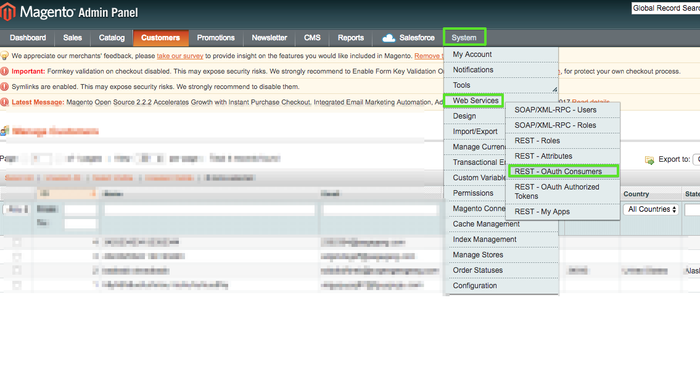
- Click on “Add New” button to add new Consumer Application
- On “New Consumer” screen define some name.
- The "Key" and "Secret" fields value will be predefined automatically by Magento. NOTE: You'll need these values later in Salesforce.
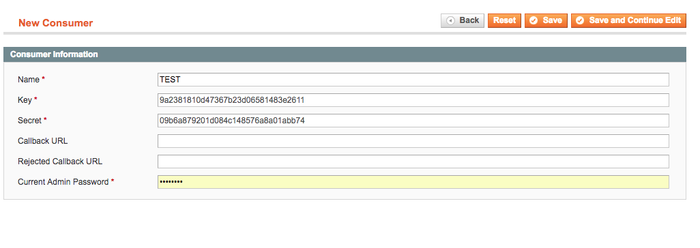
- Click the "Save" button
STEP 2: Create and configuring Rest role
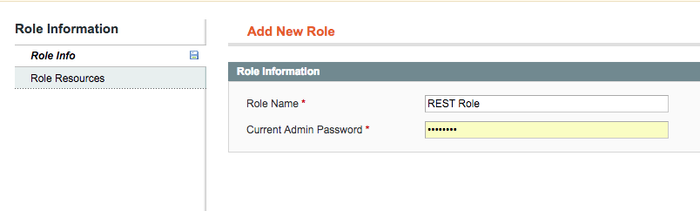
- Navigate to the "System -> Web Services -> REST Roles" page
- Click the “Add admin Role” button
- In the field “Role name” enter for example “REST Role”
- Click on “Role API resources” tab on the left and tick the Salesforce / Import / Create checkboxes, It'll allow this Role access to our module API methods
- Or you can allow access to the all resources here
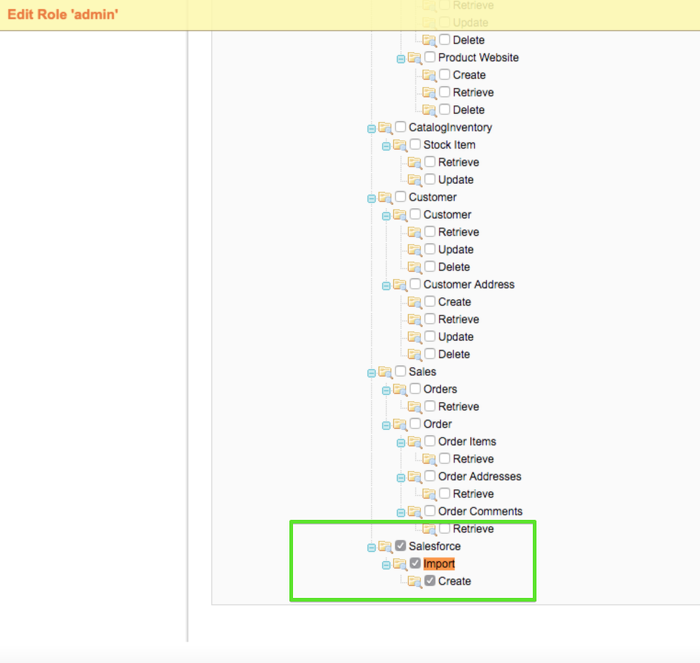
- Save this role
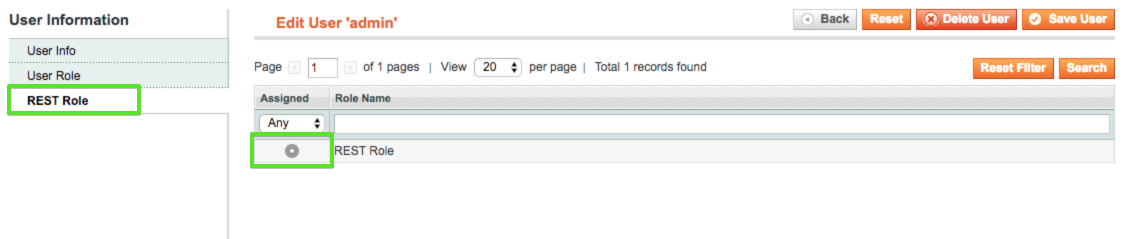
STEP 3: Assigning configured REST Role to the admin user
- Open the following page: "System->Permissions->Users"
- Find a user you plan to use for the sync process (or create a new one)
- The "Edit user" page will be shown
- Click the "REST role" tab here
- Click on “Assigned” radio box near that role name you created in our previous step
- Save changes
Configuring Salesforce:
...
STEP 1: Allowing the Connection
During installation, of our Managed Packages you will be prompted to allow Salesforce to call "http://license.powersync.biz", which you accepted.
- Navigate to "Setup" > "Administration Setup" > "Security Controls" > "Remote Site Settings"
- You should see "MagentoURL" setting
- Click: "Edit"
- Update Remote Site URL to point to your website: eg. https://my.website.com
- IMPORTANT: URL has to be HTTPS, the connection will not work with regular HTTP connection.
- Click "Save"
...
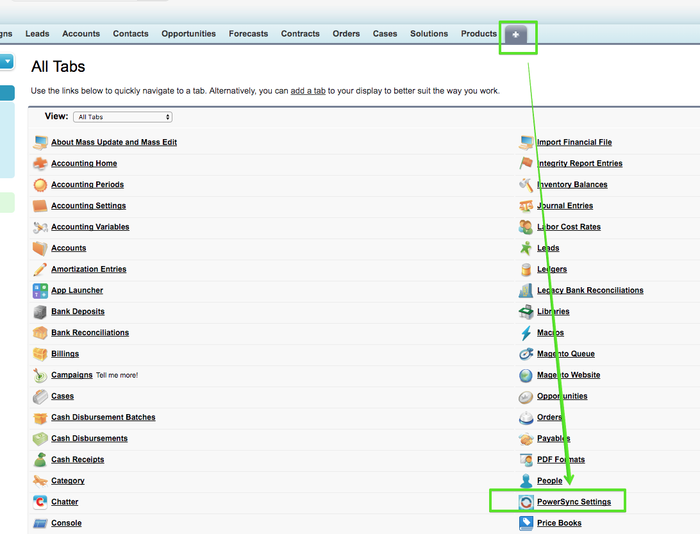
- Navigate to the PowerSync settings page:
- Choose the "M1_OAUTH" option under the "Magento Enviroment" dropdown:
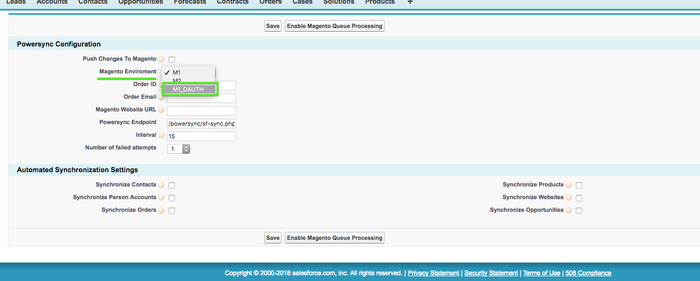
- Page will be reloaded and new fields will be shown:
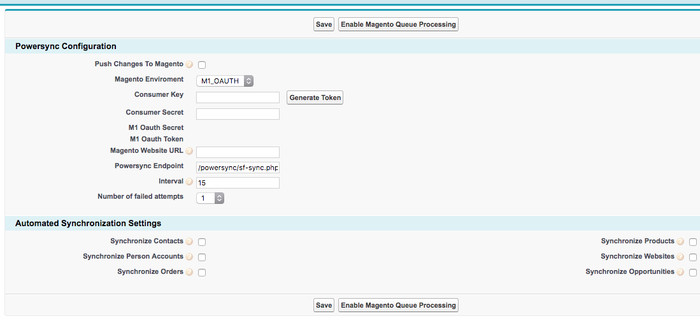
- Fill the "Consumer Key" and "Consumer Secret" fields by the values from your Magento (see STEP 1 from "Magento Configuration" section above)
- Fill the "Magento Website URL"
- Add "/api/rest/tnw_import" to "Powersync Endpoint" field
- Check the "Push Changes To Magento" checkbox
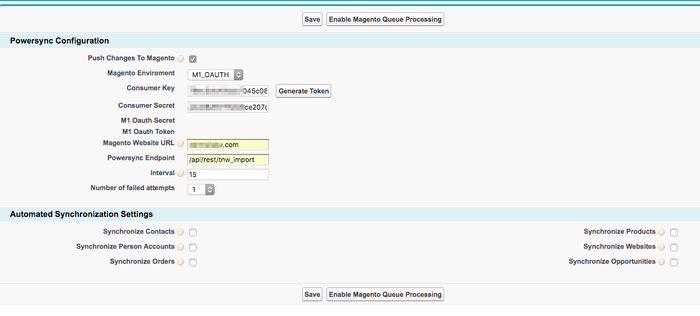
- Save it
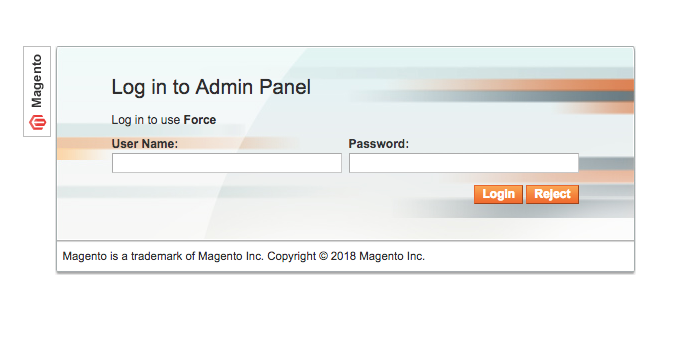
- Click the "Generate Token" button
- You'll be redirected to the authorization page of your store admin area.
- NOTE: This step will be skipped if you logged in your Magento Admin area.
- Login into Magento using an account assigned to "REST Role" (from STEP 2 under Magento Configuration section above)
- If you logged in alread the authorization request will be shown, you should click the "Authorize" button
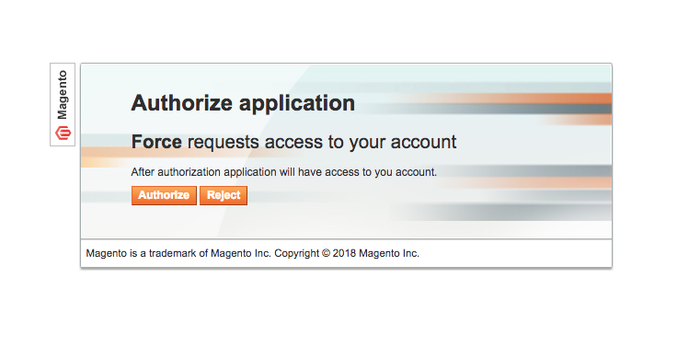
- You'll be redirected back to the Salesforce package settings:
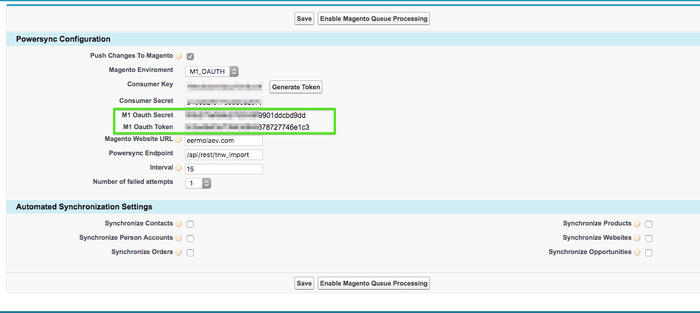
- If connection was esablished successfully, you will see the "M1 Oauth Secret" and "M1 Oauth Token" fields populated'
- Check the entities you plan sync from Salesforce to Magento under the "Automated Synchronization Settings"
- Save the configuration again
- Finally, click the "Enable Magento Queue Processing" button to enable the scheduled queue processing
...